这里讲解下loaders的例子
源码地址https://github.com/manlili/webpack_learn里面的lesson08,主要讲babel将ES6语法转化为ES5语法。
第一步
在空白的文件夹正确的安装webpack,这一步webpack入门指南已经讲过了。
然后创建源文件夹src,在src下面创建app.js,然后创建个目标文件夹dist,用来盛放打包生成的文件.
第二步
在根目录下面创建index.html,内容是:
为了测试,我们将app.js用ES6的语言来写,内容是:
第三步
配置webpack的打包配置文件webpack.config.js,内容如下:
上面的module配置意思是配置loaders,然后定义loaders使用的规则rules,请注意使用loaders之前必须先安装对应的loaders,比如上面用到了babel-loader,需要我们去babel官网找到webpack的安装方式:
babel的官网将webpack的使用方法都写的很详细:
当然关于使用babel-loader转义的options,我们可以使用的配置:
这里还有个坑,我们使用的babel-loader转义的options,比如es2015, transform-remove-strict-mode都需要先安装再使用,可以在npm官网上查找安装方法,这里我直接贴出它们的安装语法如下:
接下来来看下我们的文件夹组成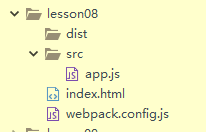
第四步
在根目录下打开命名行输入
打包后发现dist/js下面生成的app.bundle.js内容是:
上面我们可以看出生成的app.bundle.js中没有”use strict”,说明plugins: [“transform-remove-strict-mode”]起了效果。
第五步
将上面的用loaders打包换一种方法实现如下,就是将babel的参数移到package.json里面,下面来看package.json关于babel的内容配置
在根目录下打开命名行输入
打包后发现dist/js下面生成的app.bundle.js内容是:
上面我们可以看出生成的app.bundle.js中没有”use strict”,而且app.bundle.js内容和上面的直接配置plugins: [“transform-remove-strict-mode”]一模一样,说明起了效果。
第六步
将上面的用loaders打包换第三种方法实现如下,其实也可以像babel官网介绍的那样创建一个.babelrc结尾的文件写上
接着修改webpack的打包配置文件webpack.config.js,内容如下:
在根目录下打开命名行输入
打包后发现dist/js下面生成的app.bundle.js内容是:
上面我们可以看出生成的app.bundle.js中也没有”use strict”,而且app.bundle.js内容和上面的直接配置plugins: [“transform-remove-strict-mode”]结果一模一样,说明这种方法挺好,官网上比较推荐这种用法。
第七步
上面打包都说过了,但是我们也发现了运行完打包命令后,很长时间才能看到打包的结果,这是因为我们没有给babel-loaders指定待打包的文件路径,导致它需要在整个目录下一个一个寻找,下面我们来优化下打包的时间,修改webpack的打包配置文件webpack.config.js,内容如下:
在根目录下打开命名行输入
发现命令行打包的命令里面时间比以前稍微少一点,主要是我们的测试打包的文件太少,等到打包一个大项目的时候就会发现节约很多时间。